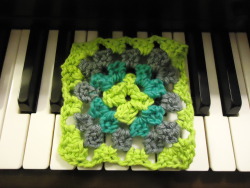
These granny squares are inspired by these granny squares. I changed the stitches because I didn't find a really tricky stitch necessary. So this is a simplified version of these. (If you know how to do the bobble stitch, please click the above link and make your grannies from Attic24's pattern!) I also ended it at the third layer. They will turn out more square if you continue with a fourth color. I will include the instructions to do that as well (though I have not yet done that).
Materials:
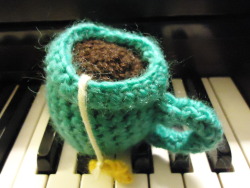
Color 1 - I used Bernat Handicrafter Holiday in Christmas Green
Color 2 - I used a grey (now a mystery as to what brand because I didn't keep the label)
Color 3 - I used Fruit of the Loom brown. Pretty old stuff!
Crochet hook - I used size I/9-5.50MM
Scissors
Round 1: (using Color 1)
Chain six, then loop back and stick the hook through the very first chain. Yarn over and pull through both loops on the hook. Chain three more. Double crochet one into the center, chain one. Now the chain and the double crochet stitch count as one 'spoke.' Double crochet two into the center, chain one. Repeat until you count eight 'spokes.'* (it will fill up the circle) Once you finish the eighth spoke, chain on and attach it to the third chain (from the very beginning) with a slip stitch.
Attach Color 2 (Attic24 gives picture instructions on how to attach the new color. Go here for those awesome instructions! Link: http://attic24.typepad.com/weblog/summer-garden-granny-square.html)
Round 2: (using Color 2)
Starting in the same hole** that you finished in (between the first and eighth spoke), Chain three, double crochet two. Chain one. In the next hole, double crochet three, chain one. Continue until you fill up all the holes. When you reach the end, chain one and attach it to the third chain (that you chained in the first step) with a slip stitch.
Attach Color 3
Round 3: (using Color 3)
Starting in the same hole at which you tied off Color 2, Chain 3, then double crochet two. This will be a corner when you finish. Chain one, in next hole double crochet three, chain one. In next hole doubl crochet three chain one and in SAME HOLE, double crochet three more. This forms a corner. Chain on, in next hole double crochet three, chain one. In next hole, doublr crochet three, chain one and in SAME HOLE, double crochet three more. Chain one, in next hole, double crochet three, chain one. In next hole, double crochet three, chain one, and in SAME HOLE, double crochet three more. Chain one, in next hole, double crochet three, chain one, and in the hole you began in, double crochet three and chain one. Connect first chain with a slip stitch.
*It is very important that there are EIGHT spokes. If there are not eight, (maybe nine like I accidentally did) then on the last round when you create the square shape, one side of the square will have four clusters instead of three. You cannot connect it to others. (if you are not being a perfectionist on these, then maybe that is okay!)
**The 'holes' I am talking about are the spaces left where you chained one after every second double crochet in Round 1.
Attic24's instructions have pictures for every step. It looks a lot like what I did, so please check those instructions out to see what to do!
Random + Writing,
CB
P.S. I commented on Attic24's pattern post asking if it was all right to post this. She never answered, so I am going ahead and putting this up. If she sees it and asks me to take it down, I will, so get this pattern quick! And forgive me if I have to take down this post someday.
Materials:
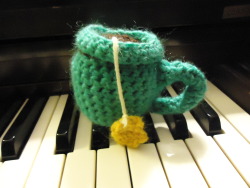
Color 1 - I used Bernat Handicrafter Holiday in Christmas Green
Color 2 - I used a grey (now a mystery as to what brand because I didn't keep the label)
Color 3 - I used Fruit of the Loom brown. Pretty old stuff!
Crochet hook - I used size I/9-5.50MM
Scissors
Round 1: (using Color 1)
Chain six, then loop back and stick the hook through the very first chain. Yarn over and pull through both loops on the hook. Chain three more. Double crochet one into the center, chain one. Now the chain and the double crochet stitch count as one 'spoke.' Double crochet two into the center, chain one. Repeat until you count eight 'spokes.'* (it will fill up the circle) Once you finish the eighth spoke, chain on and attach it to the third chain (from the very beginning) with a slip stitch.
Attach Color 2 (Attic24 gives picture instructions on how to attach the new color. Go here for those awesome instructions! Link: http://attic24.typepad.com/weblog/summer-garden-granny-square.html)
Round 2: (using Color 2)
Starting in the same hole** that you finished in (between the first and eighth spoke), Chain three, double crochet two. Chain one. In the next hole, double crochet three, chain one. Continue until you fill up all the holes. When you reach the end, chain one and attach it to the third chain (that you chained in the first step) with a slip stitch.
Attach Color 3
Round 3: (using Color 3)
Starting in the same hole at which you tied off Color 2, Chain 3, then double crochet two. This will be a corner when you finish. Chain one, in next hole double crochet three, chain one. In next hole doubl crochet three chain one and in SAME HOLE, double crochet three more. This forms a corner. Chain on, in next hole double crochet three, chain one. In next hole, doublr crochet three, chain one and in SAME HOLE, double crochet three more. Chain one, in next hole, double crochet three, chain one. In next hole, double crochet three, chain one, and in SAME HOLE, double crochet three more. Chain one, in next hole, double crochet three, chain one, and in the hole you began in, double crochet three and chain one. Connect first chain with a slip stitch.
*It is very important that there are EIGHT spokes. If there are not eight, (maybe nine like I accidentally did) then on the last round when you create the square shape, one side of the square will have four clusters instead of three. You cannot connect it to others. (if you are not being a perfectionist on these, then maybe that is okay!)
**The 'holes' I am talking about are the spaces left where you chained one after every second double crochet in Round 1.
Attic24's instructions have pictures for every step. It looks a lot like what I did, so please check those instructions out to see what to do!
Random + Writing,
CB
P.S. I commented on Attic24's pattern post asking if it was all right to post this. She never answered, so I am going ahead and putting this up. If she sees it and asks me to take it down, I will, so get this pattern quick! And forgive me if I have to take down this post someday.