Thursday, June 13, 2013

Goodbye, old friends

So, as you can see (if anyone still reads these), we are pretty much no longer posting anymore. RK and I are still friends, but it is hard for anyone to maintain a closer-than-glue relationship from opposite corners of the country. We are still perfectly wonderful friends, but we are friends of faith that we remain that way. We have spoken 2 or 3 times in the last year, though I do not believe us to have grown apart at all, if you can believe that. I have made a couple new friends, and RK has, as well, but none replace either of us, I am sure.

Enough rambling about that, now.

The Art Drawer has been going for nearly two wonderful years, and for that we are proud. We have posted our feelings, our work, and our interests in this website. But I believe that has come to a close.

I have not consulted RK about this, but seeing as neither of us have posted for 6 months, I think she will agree when I say that we have finished with The Art Drawer. It served its purpose, which was a place for us to continue to work together and be connected, and to show our work to the world. And it has done just that, and more for us. It has served us well, and I still love our website, our place, our Art Drawer. But its work is done, and we must now retire the poor old thing.

We are not deleting the website; our things will still be here; but we are finishing with it once and for all. It is time to lay the idea of The Art Drawer to rest. Our long absence will become a permanent one, and this blog will fade from our and your memories, but it will still be here. 

Waiting. 

Waiting for you to discover it again.

Random + Writing, for the very last time,
CB

Tuesday, January 29, 2013

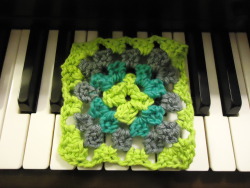
Granny Square Pattern

These granny squares are inspired by these granny squares. I changed the stitches because I didn't find a really tricky stitch necessary. So this is a simplified version of these. (If you know how to do the bobble stitch, please click the above link and make your grannies from Attic24's pattern!) I also ended it at the third layer. They will turn out more square if you continue with a fourth color. I will include the instructions to do that as well (though I have not yet done that).

Materials:
Color 1 - I used Bernat Handicrafter Holiday in Christmas Green
Color 2 - I used a grey (now a mystery as to what brand because I didn't keep the label)
Color 3 - I used Fruit of the Loom brown. Pretty old stuff!
Crochet hook - I used size I/9-5.50MM
Scissors

Round 1: (using Color 1)
Chain six, then loop back and stick the hook through the very first chain. Yarn over and pull through both loops on the hook. Chain three more. Double crochet one into the center, chain one. Now the chain and the double crochet stitch count as one 'spoke.' Double crochet two into the center, chain one. Repeat until you count eight 'spokes.'* (it will fill up the circle) Once you finish the eighth spoke, chain on and attach it to the third chain (from the very beginning) with a slip stitch.

Attach Color 2 (Attic24 gives picture instructions on how to attach the new color. Go here for those awesome instructions! Link: http://attic24.typepad.com/weblog/summer-garden-granny-square.html)

Round 2: (using Color 2)
Starting in the same hole** that you finished in (between the first and eighth spoke), Chain three, double crochet two. Chain one. In the next hole, double crochet three, chain one. Continue until you fill up all the holes. When you reach the end, chain one and attach it to the third chain (that you chained in the first step) with a slip stitch.

Attach Color 3

Round 3: (using Color 3)
Starting in the same hole at which you tied off Color 2, Chain 3, then double crochet two. This will be a corner when you finish. Chain one, in next hole double crochet three, chain one. In next hole doubl crochet three chain one and in SAME HOLE, double crochet three more. This forms a corner. Chain on, in next hole double crochet three, chain one. In next hole, doublr crochet three, chain one and in SAME HOLE, double crochet three more. Chain one, in next hole, double crochet three, chain one. In next hole, double crochet three, chain one, and in SAME HOLE, double crochet three more. Chain one, in next hole, double crochet three, chain one, and in the hole you began in, double crochet three and chain one. Connect first chain with a slip stitch.

*It is very important that there are EIGHT spokes. If there are not eight, (maybe nine like I accidentally did) then on the last round when you create the square shape, one side of the square will have four clusters instead of three. You cannot connect it to others. (if you are not being a perfectionist on these, then maybe that is okay!)

**The 'holes' I am talking about are the spaces left where you chained one after every second double crochet in Round 1.


Attic24's instructions have pictures for every step. It looks a lot like what I did, so please check those instructions out to see what to do!

Random + Writing,
CB

P.S. I commented on Attic24's pattern post asking if it was all right to post this. She never answered, so I am going ahead and putting this up. If she sees it and asks me to take it down, I will, so get this pattern quick! And forgive me if I have to take down this post someday.

Amigurumi, Granny Sqaures, and Sewing


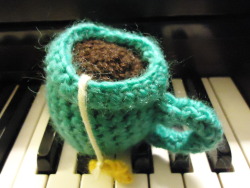
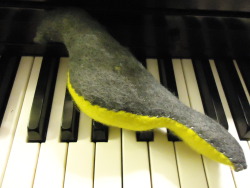
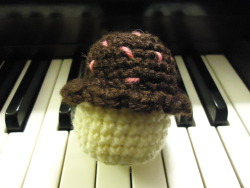
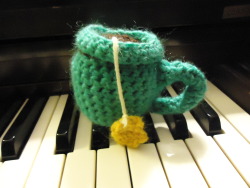
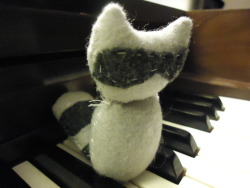
These are some things that I have been making. I am also making a granny square blanket of a different pattern than the one shown here. Pictures to come. I am making a granny square blanket of the same pattern shown, but in only one granny square, so it just goes around and around getting bigger until it is the size I want. I am getting really into crochet again, which I am very excited about!!

Sunday, December 23, 2012

Apocalypse 2012 Horror Movie

Six friends went out on a 'hunt for the apocalypse,' just for fun, but none of them came back. This is the footage from their camera.

Just kidding! This is an improv movie my friends (Kelli, Gabbi, Scarlett, Marissa, Briella) and I did while on our hunt for the apocalypse. It was a lot of fun to make, and I love our plot! We did this while at Gabbi's house for our apocalypse party.


So, did you survive the 2012 apocalypse? Remember, we all got to pretend stuff happened so we can tell our children and grandchildren our war stories and such. Did ya see those zombies? Heh heh, they were terrible, right?

Random + Writing,
CB

Sunday, November 25, 2012

My posting relapse

Hey everyone!! Its RK again... Omigosh, I am very sorry I haven't posted anything in..... almost....... a year..... O____O wow has it really been that long?! Well anyways I am going to make it a personal goal that if I find somethng interesting, motivating, or fun then I will post about it!! Right now I am feeling very motivated and organized and prioritized enough to start posting again! I just can't type fast enough to get all my thoughts down!!! AAAH!! Well my next post might not be the most interesting, but after reading it I'm sure you will be able to accomplish.... *in whispery voice* ANYTHING.  Okay! I'ma go type it!! :D

Keep it Nurby! ~RK

Monday, November 19, 2012

Haunted House: Night Of

The haunted house was on Oct 27, 2012. I had a bunch of stuff to do after that with drama so I couldn't write about it yet. Anyway, it was amazing! My whole schpeil was about no one ever bringing my grave flowers, and how I was so upset that they were going to Grandmother's House (the plot of the HH was that they were going to Grandmother's House) instead of visiting me! It was a lot of fun and everyone did a super awesome job!

We had probably 20 groups of about 20 people, and each person was a $3 dollar donation to the Henegar Center, so we made a lot of money! But, of course, having fun and giving the little ones a fun experience was the main goal! :D

One of the groups had to be sent through backwards for reasons I don't know. So we got about a minute to try and figure out what the plot was going to be since they started at Grandma's House, where it usually ended. So it was just that they were running away from Grandma instead. It was our least happy and nice group! The other ones at least answered. And in Grandma's, they are supposed to dance  to funny Halloween music and have fun, but they just stood their while our Grandma danced.

ME: Oh, you all went to grandmother's house, didn't you?
GROUP: -_-
ME: She is not a very fun person to be with, now is she?
GROUP: -_-
ME: Well, did you at least dance?
GROUP: -_-
ME: Well, then! But I know I can assume you brought me flowers!
GROUP: NO!
ME: Then you are not welcome in MY graveyard! Go on, then!
GROUP: -_- (leaves)

So, yeah.

But I didn't get any pictures, I apologize. There wouldn't have been any light, after all! It was a great acting experience for me, and I think I would like to participate in future Haunted Houses and similar improvisational things like that.

Have you every been to a Haunted House? Have you ever worked in one?

Random + Writing,
CB

Saturday, October 20, 2012

Haunted House: Building Phase

Today we built the sets! It was amazingly fun!

I was the first there. Alone. In a dark, abandoned place. Yeah. Then more people came! Yay! But we still couldn't find Miss Pam. Then we found her down in the basement, through several drapes and walkways. She gave us buckets and boxes to carry and sent us off through the rooms of the abandoned haunted house. It was all these dummies and actually scary stuff, but it was all about 3 years old and completely untouched. We were to ransack the place for any props and such we could find. We ripped all these fake cockroaches off the walls, took all these spice jars and cups and all the scary stuff. I think the best find was this goblet with skulls as the stem! Another great find were actual animal bones. The girl with us freaked, and I wanted to examine it, but they wouldn't let me. (***not a find as in we took them with us***)

We went through room after room doing this, and all we had were two flashlights (one of which was mine). It was completely dark. No A/C, either. But we made it!

More people came and we took them down and went in all the rooms again and got even more stuff. We finally came to this one room that was too scary for any of us to go through. Probably didn't have anything, either. It was a room FILLED with hangers. With something on them that looked like a head and shoulders. With sheets over them. With blood on it. BODY BAGS HANGING FROM THE CEILING!!! One of us went through, not sure who, and we never saw them again......... Until they came back out. We left the basement and collected the foam headstones from the stairs.

We came out with our loot and loaded it into the Henegar basement (we had been in the high school basement). Then two more people came. We all worked and did stuff.

Mrs Pam gave us these carpeted stage dividers. They were rectangles with these little feet on the bottom. Used to divide a scene, or as a backstage, maybe. We took the elevator to get the four of them to the first floor, then got them down the basement stairs (finally). We did stuff after that down in the basement, looking for things. Mrs Pam them walked us through what the haunted house would be like. Really cool!!!

We blew up inflatable pumpkins, too, and went through props. We have the scarecrow scene set up, and the fortune teller's set almost done. :) I am going to be in the cemetery!

We danced around together for a while, but then it was four and we had to leave (we were to be there from 1 to 4).

I had a lot of fun, and it was an amazing bonding experience for all of us! I think we are better friends now after being scared and startled together for hours! All the people there were from our cast, so we were all friends already. Now we have even more trust for each other and will be able to perform with each other even better than before!

Random + Writing,
CB

P.S. Don't forget! Next Saturday, October 27!


Thursday, October 18, 2012

Haunted House

A children's haunted house is coming to the Henegar Center for Performing Arts! [Live in our area? Here's the link! http://www.henegar.org/shows/hauntedhouse2012.htm] And guess what? I am acting in it!

Miss Pam, my drama teacher at Stage1Stars at the Henegar Center, asked us to participate! A lot of our cast signed up to help, so there will be a bunch of friendly faces in the midst of the scariness! I signed up to be a cemetery character. I already have a costume funeral dress: black with black lace up the arms. I am going to be sort of a Woman in Black type of ghost. My friend Priscilla will be a mad scientist! Not too scary, but kind of creepy-halloween-y!

It also counts as community service hours! If you live anywhere near the Henegar, please come join us! Contact my teacher, Pam Mankowski at stage1stars@aol.com. If you don't want to be a part of it, but want to send your little ones, click the link towards the top of the post! That has the flier and info on it.

The haunted house will not be all bloody and gore-y or anything. It is for little bitty kids, so just a little creepy and fun!

It has been my dream for years to be a part of a haunted house! It is creepy role-playing and costumes for people who want to be there with you! Or, really, DON'T want to! ;D

Maybe I will put up pictures from the haunted house? I don't know.

October 27th, 2012! I am excited!


Also, just missed the closest Zombie walk! Oct 11. Last week! Argh! I misread the article. I thought it was today, but the one in the article actually said Downtown Orlando, not Downtown in my town. Huff!

Random + Writing + Haunted Houses and Zombies,
CB

Sunday, October 7, 2012

Halloween!: Detached Eyeball Crochet Pattern

I'm still alive, I promise! Sorry it has been so long, but I have been practicing crochet and making lots of different things, and now I am pretty good!

I might be alive, but this eyeball isn't! In my soon-to-be long line of Halloween-themed patterns comes a detached eyeball! Created originally for my dad to take to work and sit on his desk, this eyeball will spruce up any candy bowl or empty table this halloween.

If you cover you eye with your hand while holding the tip of the red,
it swings all grossly and it looks really cool/funny/disgusting/all three.


UPDATE: If you use a smaller hook, like a G, and attach the red a bit farther back, it makes it a LOT better. I don't like how the one in the picture has this weirdly shaped iris and pupil, but I made a new one with a lighter and brighter blue and the things I mentioned and it turned out a lot better!

MATERIALS:
Yarn: Black (pupil), Blue/Green/Brown (iris), White (white of eye)
Crochet hook: J/10 (6.00mm)
Fiberfill

ABBREVIATIONS USED:
R[#]: Round [#]
sc: single crochet
dec: decrease
inc: increase
*_* [word]: In between ‘*’ is order of pattern, word after is how many times to repeat the pattern
--: continue for as long as desired
ch: chain
Sk: slip knot

EYEBALL
(Black)
Worked from pupil to back of white of eye (back of eye will not be exposed)
R1 Magic ring 3 (3)
(Iris Color)
R2 *2 sc* around (6)
R3 *1 sc, 1 inc* around (9)
(White)
R4 *2 sc, 1 inc* around (12)
R5 *3 sc, 1 inc* around (16)
R6-7 *1 sc* around (16)
R8 *3 sc, 1 dec* around (12)
R9 *1 sc, 1 dec* around (8)

NERVE
(Red)
Worked from middle of eyeball down into cone shape
R1 Attach red at eighth round (16)
R2 sc 1 in each (16)
R3 1 dec, 2 sc (12)
R4-5 sc 1 in each (12)
R6 1 dec, 2 sc (9)
R7 sc 1 in each (9)
R8 1 dec, 2 sc (7)
R9 dec 2, sc around (4)
R10-- sc around (4)
Join together so there is no hole in the red. 
Ch 12 from the closing, tie off.
Sk, then work 7 stitches on the chain from the closing of the cone.


Random + Crochet,
CB

Saturday, September 8, 2012

How To Crochet a Teardrop Animal Tail

I am crocheting a fox right now! The creator of the pattern I am using has asked for it not to be shared anywhere, so I won't be posting that (but you can see it here). With no disrespect to the designer, I didn't care for the tail much, so I went searching for it around the internet. I came across a tumblr blog with the perfect pattern for it, but it was for sale, not free (see that blog (Sweet N' Cute Creations) here. It is the Fennec Fox post). SO, I had to make my own since I didn't find another one I liked. Thankfully I recorded the rounds I did. I don't believe the longer part of the tail was recorded right, but the teardrop bit is right.

The following words are going to be or people searching keywords for this kind of tail:

Teardrop, fox, tail, white, red, poof, amigurumi, crochet, rounds, single crochet, puffy tail, puff, animal, free, pattern, how to, tutorial,

Materials:

Yarn (Maybe white for the tip and another color appropriate for your animal)
Crochet hooks: Size K/10, and size H/8 (K/10 can also be the hook size you used for the rest of your animal; H/8 is just a smaller size than the regular size you are using)
Scissors
Stuffing
Yarn scraps

Notes:
If you don't know how to increase, decrease, and magic circle, try these links: IncreaseDecreaseMagic Circle.
SC= Single Crochet, or the regular crochet stitch.
R19 through 27 are the long pat of the tail. Adjust to fit your own animal.

   In White:
R1: 3 stitches into magic circle (3 stitches)
R2-4: One sc each stitch around (3 stitches)
R5: Increase each stitch (6 stitches)
R6: Increase each stitch (12 stitches)
R7: Increase each stitch (24 stitches)
R8-16: One sc each stitch around (24 stitches)
   Switch to Red (or other color)
R17: sc each stitch around (24 stitches)
R18: Two decrease, two sc (16 or 17 stitches)
R19-21: sc in each (16 or 17 stitches)
R22: Two decrease, two sc (12 stitches)
R23: Two decrease, one sc (9 stitches)
R24-27: sc each stitch around (9 stitches)
End with a slip stitch and cut, leaving a long tail to attach it to your creature!

I hope I helped and didn't cause frustration! I had to do some weird stuff with the tip of mine because i went to long at the very beginning and hd to tuck it in a sew it with the hook and do lots of weird stuff, so it may not turn out right... Ha, that is how all my tutorials seem to be, huh?  Haha! :)

'Sweet N' Cute Creations''s Amigurumi Fennec Fox pictures AND 'Nimoe's Blog' (http://nimoe.wordpress.com/2008/02/03/fox-amigurumi-pattern/) inspired me to create this tail. Thanks to them!

Random + Writing,
CB

P.S. If you find anything wrong with this pattern, or figure out if R18 and 19 had 16 or 17 stitches, PLEASE do comment to me and I will adjust it! :)